I have only two rules which I regard as principles of conduct.
The first is: Have no rules.
The second is: Be independent of the opinion of others.
-Albert Einstein
In everything, do to others what you would want them to do to you.
-Jesus
We need to be the change we wish to see in the world.
-Mahatma Gandhi
If I have seen further it is only by standing on the shoulders of giants.
-Isaac Newton
It is not enough to have a good mind.
The main thing is to use it well.
-Descartes
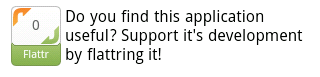
This tutorial guides you through the necessary steps needed to set up a flattr button like the one above in your application (an example application that shows the button in action can be downloaded from
here). Unfortunately the user have to be logged in to flattr to be able to click the button, which in this case means that the web browser will be launched and the user asked to flattr the application there. Probably discourageing some potential flattrers. Hopefully there soon is a clever work around to this, but in the meantime this method might suffice to generate some flattring of your application.
In order to get a flattr button working in your application there are a few steps you have to take. First of all you must have an active flattr account. This flattr account must be used to register a "thing", to which you have to bind a URL. You therefore have to come up with a URL with witch you can associate your application. (I do for example use the description page for each application here on this site for my applications.) The final step is to write some code. I will here walk you through each of these steps.
It is assumed in this tutorial that development takes place in an eclipse environment, but nothing critical relies on it.
Creating a flattr account
If you do not yet have a flattr account, the first thing you should do is to create one. Registration is free, but in order to be able to be flattred you have to have an active account, which means you have to pay a monthly fee of at least 2 euro with which you can flattr others. No one gets without giving. Most of this tutorial can be followed without paying the monthly fee. But to get an actual button to work, you will have to pay for at least one month.
To create a flattr account, visit
flattr.com/register. Follow the steps described on the site to complete the registration and add flattr funds. I will from here on assume that you have submitted funds, but remember that most of the steps can be followed without doing so.
Creating a "thing"
On flattr, each thing you can flattr is a "thing", and they are associated with a URL. To create a thing you have to submit a "thing" by logging into your account and click "Submit Thing" in the top right corner. Fill in the form on the submit thing page and click "Submit Thing!" to complete the submission. You are now ready to begin to code. The URL entered in this step will from here on be referred to as APPLICATION_URL in text and code.
The FlattrView
The FlattrView described here is a simple extension of a WebView. It will require that the application have permission for Internet access, how to give such permission will be described under "Giving permission for Internet access".
The FlattrView code is:
package APPLICATION_PACKAGE;
import android.webkit.WebView;
import android.content.Context;
import android.util.AttributeSet;
public class FlattrView extends WebView{
public FlattrView(Context context, AttributeSet attrs){
super(context, attrs);
String namespace =
"http://schemas.android.com/apk/res/APPLICATION_PACKAGE";
String flattrURL =
attrs.getAttributeValue(namespace, "flattr_url");
String flattrCode =
"<html>" +
"<head>" +
"<script type=\"text/javascript\">" +
"/* <![CDATA[ */" +
"(function() {" +
"var s = document.createElement('script')," +
" t = document.getElementsByTagName('script')[0];" +
"s.type = 'text/javascript';" +
"s.async = true;" +
"s.src = 'http://api.flattr.com/js/0.5.0/load.js?mode=auto';" +
"t.parentNode.insertBefore(s, t);" +
"})();" +
"/* ]]> */" +
"</script>" +
"</head>" +
"<body>" +
"<table>" +
"<tr>" +
"<td>" +
"<a class=\"FlattrButton\" style=\"display:none;\"" +
"href=\"" + flattrURL + "\"></a>" +
"</td>" +
"<td>" +
"Do you find this application useful?" +
" Support it's development by flattring it!" +
"</td>" +
"</tr>" +
"</table>" +
"</body>" +
"</html>";
getSettings().setJavaScriptEnabled(true);
loadData(flattrCode, "text/html", "utf-8");
}
}
The only modification you need to do to this code is to replace "APPLICATION_PACKAGE" at the two places where it appears with the name of your actual application package.
To understand what this code does, take a look at the button code for your thing on
flattr.com (log in -> click on your user name -> select your "thing" -> click "Button code"). The first three lines after the call to the super constructor in the FlattrView creates a "flattrCode"-string which is constructed to include the code for the first button code on the "Button code"-page. To do so it uses the URL passed to the FlattrView by the argument "flattr_url" (we will later see how this URL is specified in our xml-layout file).
In addition to the button code the "flattrCode"-string contains an enclosing environment of html-tags to create a complete web page that includes the button as well as a short string that encourages the user to click the tag. ("Do you find this application useful? Support it's development by flattring it!")
This code is ready to be interpreted by a web browser that accepts javascript, and the two last lines in the constructor solves this. First javascript is enabled, and then our "flattrCode"-string which contains the complete content of a web page is passed to the WebView.
attrs.xml
In the last section the FlattrView class was created, but it required the APPLICATION_URL to be passed to it from the xml_file. In this section the attrs.xml file is set up to allow this to happen.
If you do not have an attrs.xml file in your project yet, you should create one under "res/values/attrs.xml". Your attrs.xml file should look something like the following (if you do not have one, create on with this content but exclude "..."):
<?xml version="1.0" encoding="utf-8"?>
<resources>
...
</resources>
Now add the following code between the resource tags
<declare-styleable name="FlattrView">
<attr name="flattr_url" format="string"/>
</declare-styleable>
These lines declare that the FlattrView accepts an attribute called flattr_url and is what will be used in the next section when we pass the APPLICATION_URL to the FlattrView from the xml-layout file.
The xml layout file
It is now time to add the FlattrView to the layout file. This is done by adding the following code to the layout file.
<APPLICATION_PACKAGE.FlattrView
xmlns:flattr=
"http://schemas.android.com/apk/res/APPLICATION_PACKAGE"
android:layout_width="fill_parent"
android:layout_height="wrap_content"
flattr:flattr_url=
"APPLICATION_URL"
/>
The first line in the FlattrView tag specifies that we are using attributes from the attribute file created above and gives us the ability to access these as "flattr:attribute_name". The attribute we are interested in here is of course "flattr:flattr_url". On the last line the APPLICATION_URL is passed to the FlattrView throught this argument and we are almost ready to instatiate the view using setContentView().
In case you not already have a layout file you want to include your FlattrView in, you can use the following code for testing (create a file named main.xml under res/layout/ and include the following code)
<?xml version="1.0" encoding="utf-8"?>
<LinearLayout
xmlns:android="http://schemas.android.com/apk/res/android"
android:orientation="vertical"
android:layout_width="fill_parent"
android:layout_height="fill_parent"
>
<APPLICATION_PACKAGE.FlattrView
xmlns:flattr=
"http://schemas.android.com/apk/res/APPLICATION_PACKAGE"
android:layout_width="fill_parent"
android:layout_height="wrap_content"
flattr:flattr_url="APPLICATION_URL"
/>
</LinearLayout>
Remember to replace all APPLICATION_PACKAGE and APPLICATION_URL strings with their actuall values in your project.
Giving permission for Internet access
As the FlattrView requires Internet access, permission for such must be given to the application in the manifest file. To do this, open AndroidManifest.xml in text-mode (click on the AndroidManifest.xml folder below the window if the file does not show up in text but in some graphical interface when it is selected from the package menu).
Now, if it does not already appear in the file, add the following line just before the "/manifest" tag:
<uses-permission android:name="android.permission.INTERNET" />
Setting the content view
We can now test whether everything was successful by showing our layout to the screen. In your activity's onCreate method, or wherever you preffer to set the content view from, add
setContentView(R.layout.YOUR_LAYOUT_FILE);
Replace YOUR_LAYOUT_FILE with the name of your layout file. In case you created the "main.xml" file above, the name is "main".